The Windows 10 Anniversary Update brings a number of new features to Microsoft’s latest operating system – some more significant than others -- but expect some annoyances as well. Windows 10 is a solid operating system that is receiving a good slew of bug fixes and feature enhancements free of charge, on a potentially free OS upgrade (if you came from a Windows 7 or 8 PC).
After the update you may notice some icons and shortcuts you had probably deleted, like the Windows Store or the Edge browser icon on the taskbar, have been added back. That's just old Microsoft keeping to old ways, but that's easily fixed. Deeper Cortana integration has also been a controversial subject ahead of the Anniversary Update release, but for the most part this can also be tweaked, disabled or ignored completely.
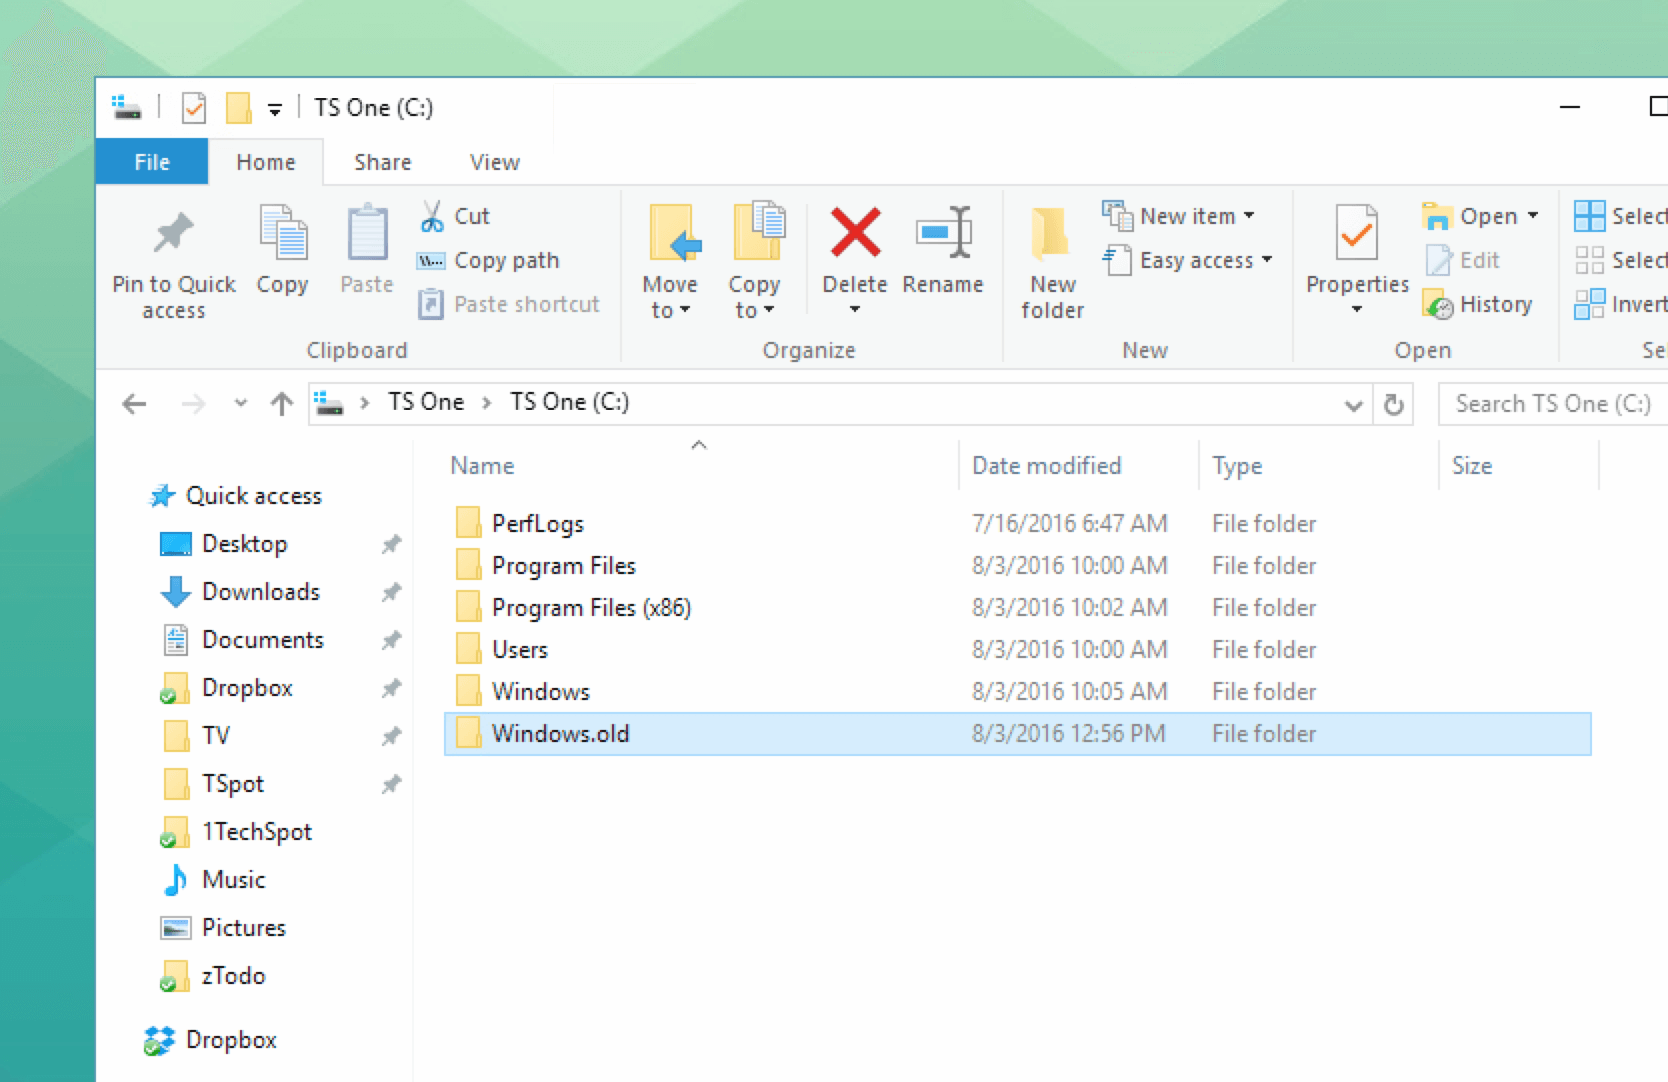
Now, something that may not be as obvious is that the big update is treated almost like a Windows upgrade. To keep on the safe side, Microsoft's install setup saves a full copy of your current Windows installation (that's the Windows.old directory right there), and while this will come handy in case something goes wrong or you need to revert back, it will also occupy several gigabytes of precious storage.

This is not new to Windows 10, but it is somewhat surprising to see a full backup performed after a mere update which in Microsoft's eyes may be more akin to Service Packs of yesteryear.
If you have plenty of free space and don't mind the untidiness, you can simply ignore the folder and it should be deleted automatically 30 days after the update. If you think you may want to revert back changes, deleting this folder will take away that option from your hands as well.
But if you are strapped for storage space, you can use Windows' own tools to remove it.

If you try to delete the Windows.old directory using File Explorer, the OS will prevent you from doing so as they are considered system files. You could bypass these after meddling with permissions settings, but there's no need to do that. Here's how you do it:
Removal in 5 Steps
Step 1. Go to Start and type 'Disk Cleanup'.
Step 2. Open Disk Cleanup and select your main system drive.
The tool will scan your drive for unnecessary files and old cached data. However the Windows.old directory won't be accounted for.
The tool will scan your drive for unnecessary files and old cached data. However the Windows.old directory won't be accounted for.
Step 3. Select the option "Clean up system files" near the bottom of the window. Select your main drive again and the scan process will be repeated.
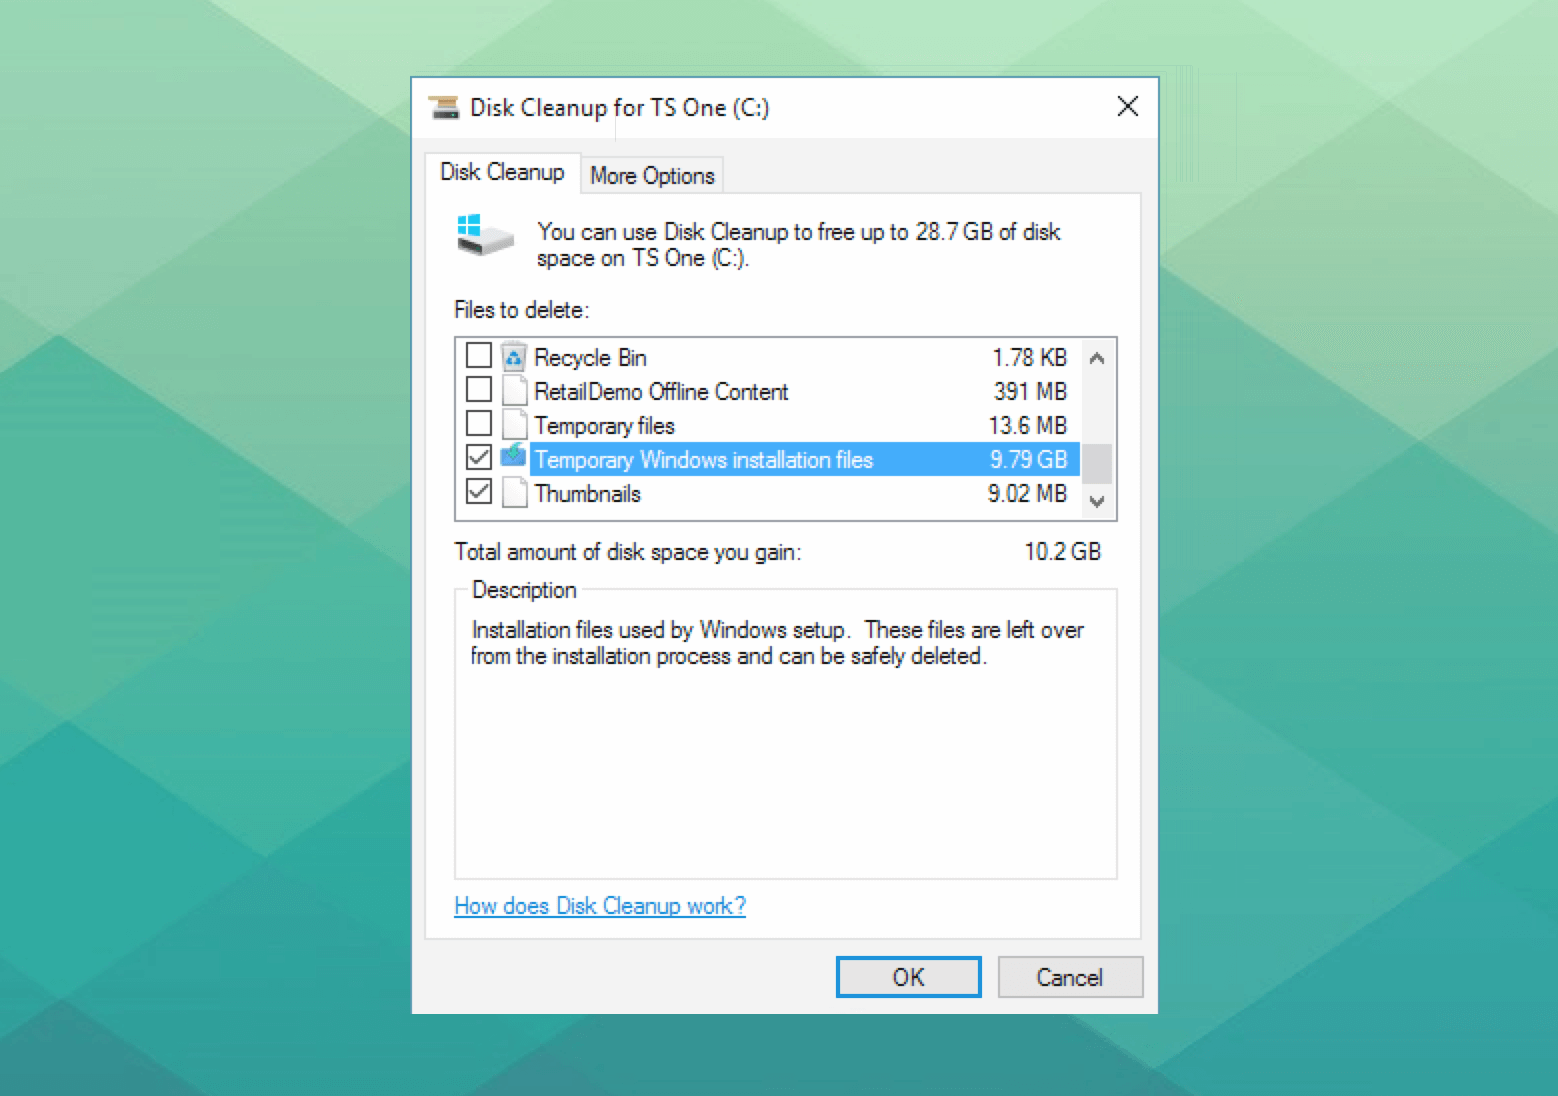
Step 4. The result of the scan will display different types of data, from Recycle Bin files to temporary internet cache. This time around, "Temporary Windows installation files" will be there, accounting from as little as 9GB to as much as 25GB, or more.
Step 5. Select all the files you want to remove, including the Windows installation files. Click OK. Then confirm the subsequent prompts.

If you are using a modestly sized SSD, I'm sure you'll appreciate gaining the extra space back.
In case you're wondering, it's completely safe to clean up any of the files listed by this tool -- just don't delete the Recycle Bin contents if you want to recover something later (!). Other third party cleaning tools like CCleaner can also be used although in this case, it's not necessary.
FEATURES TIPS & TRICKS Delete the Windows.old Folder and Save Space (Again)
![FEATURES TIPS & TRICKS Delete the Windows.old Folder and Save Space (Again)]() Reviewed by Aslam Perumani
on
November 13, 2017
Rating:
Reviewed by Aslam Perumani
on
November 13, 2017
Rating:


No comments: